Setting Up a Firewall with Raspberry Pi and OpenBSD
Setting Up a Firewall with Raspberry Pi and OpenBSD
Tired with my current firewall, I have decided to switch over to a Raspberry Pi 4 running OpenBSD. In this post I describe how I did this and the problems that I ran into.
For quite a while now I’ve wanted to replace a Watchguard firewall at home. I find Watchguard’s Firebox to be quite troublesome, and I rather dislike that I had to pay hundreds of pounds to buy it, and then pay hundreds more every year to use it.
So this week I took it upon myself to set up a router at the apex of my network using a Raspberry Pi. I decided that I would use OpenBSD for this.
Why not pfSense?
When I first started thinking about changing my firewall, my immediate thought was to use pfSense or OPNSense. However, I don’t really want to use either of these anymore. My reasons are fairly vague and subjective, and probably not worth going into too much.
My main gripe is that pfSense (and therefore OPNSense) are based on FreeBSD. Not that I have a problem with FreeBSD, but my choice for a firewall appliance would almost always be OpenBSD. OpenBSD is more heavily focused on security and correctness. FreeBSD, on the other hand, focuses more on performance.
Don’t get me wrong, I still love FreeBSD, but it’s not the BSD I’d pick for a firewall.
It seems to me that the main reasons that pfSense and their kin use FreeBSD are:
- pfSense was a fork from m0n0wall, which already used FreeBSD.
- FreeBSD has much better wireless support than OpenBSD.
- FreeBSD has much better network performance (such as multi-processor support for PF packet filters).
On the second point, I’m not hugely in favour of my WAP being built in to my firewall. I’d rather have the device at the apex of my network focused entirely on being the router for that network. I find that using a separate WAP to be preferable. The third issue, that of network performance, is hardly a problem on a small home network with a ~70Mbps Internet connection.
Installing OpenBSD on a Raspberry Pi
I intend to install OpenBSD on a Raspberry Pi and set up the router configuration myself. To start with, I’ll need to install OpenBSD on a Raspberry Pi.
I selected a Raspberry Pi 4B and used a latest Raspberry Pi OS to update the firmware to the latest
version so that I could boot from USB. I then changed the boot order using raspi-config to boot
from USB before the microSD. Once completed, I was ready to prepare the installation media for
OpenBSD.
raspi-config tool.Ruining Partitions
The first problem I had was that I thought I’d need to use the Raspberry Pi UEFI firmware in the OpenBSD ARM64 installation image. This is why we actually read documentation first, rather than waste time doing something unnecessary.
To get the firmware into the installation image, I downloaded v1.37 of the Raspberry Pi firmware,
then mounted the FAT16 partition at the start of the OpenBSD installation image (install75.img). I
copied all the files from the UEFI firmware into that partition. As usual, there was a problem: the
install75.img has the partition configured to be very small. So small that I cannot fit the actual
UEFI firmware onto the partition.
In order to get the new firmware onto the boot partition, I decided to just modify the partitions
once they were on a USB stick. So, I wrote the install75.img image file to a USB stick, then
plugged the stick into a Linux machine. On that machine I was able to use GParted to move the main
BSD partition to the right a tad, and then resize the FAT16 boot partition. Of course GParted cannot
resize a FAT16 filesystem 😒, so I mounted the boot partition and copied the contents to another
directory. I then added to this directory all the UEFI firmware files from the Raspberry Pi firmware
distribution, overwriting anything in the process. Then I deleted the existing FAT16 partition and
created a new one (remembering to set the boot and LBA flags). I then copied the modified contents
back into this new filesystem.
As usual, none of that worked. OpenBSD could not boot finish booting, as there was a problem with the partition that I had moved.
Booting without UEFI Firmware
The very first sentence in the section of the arm64 installation instructions entitled “Install on Raspberry Pi” is as follows:
The standard miniroot supports at least the Raspberry Pi 3 and 4 with no additional firmware.
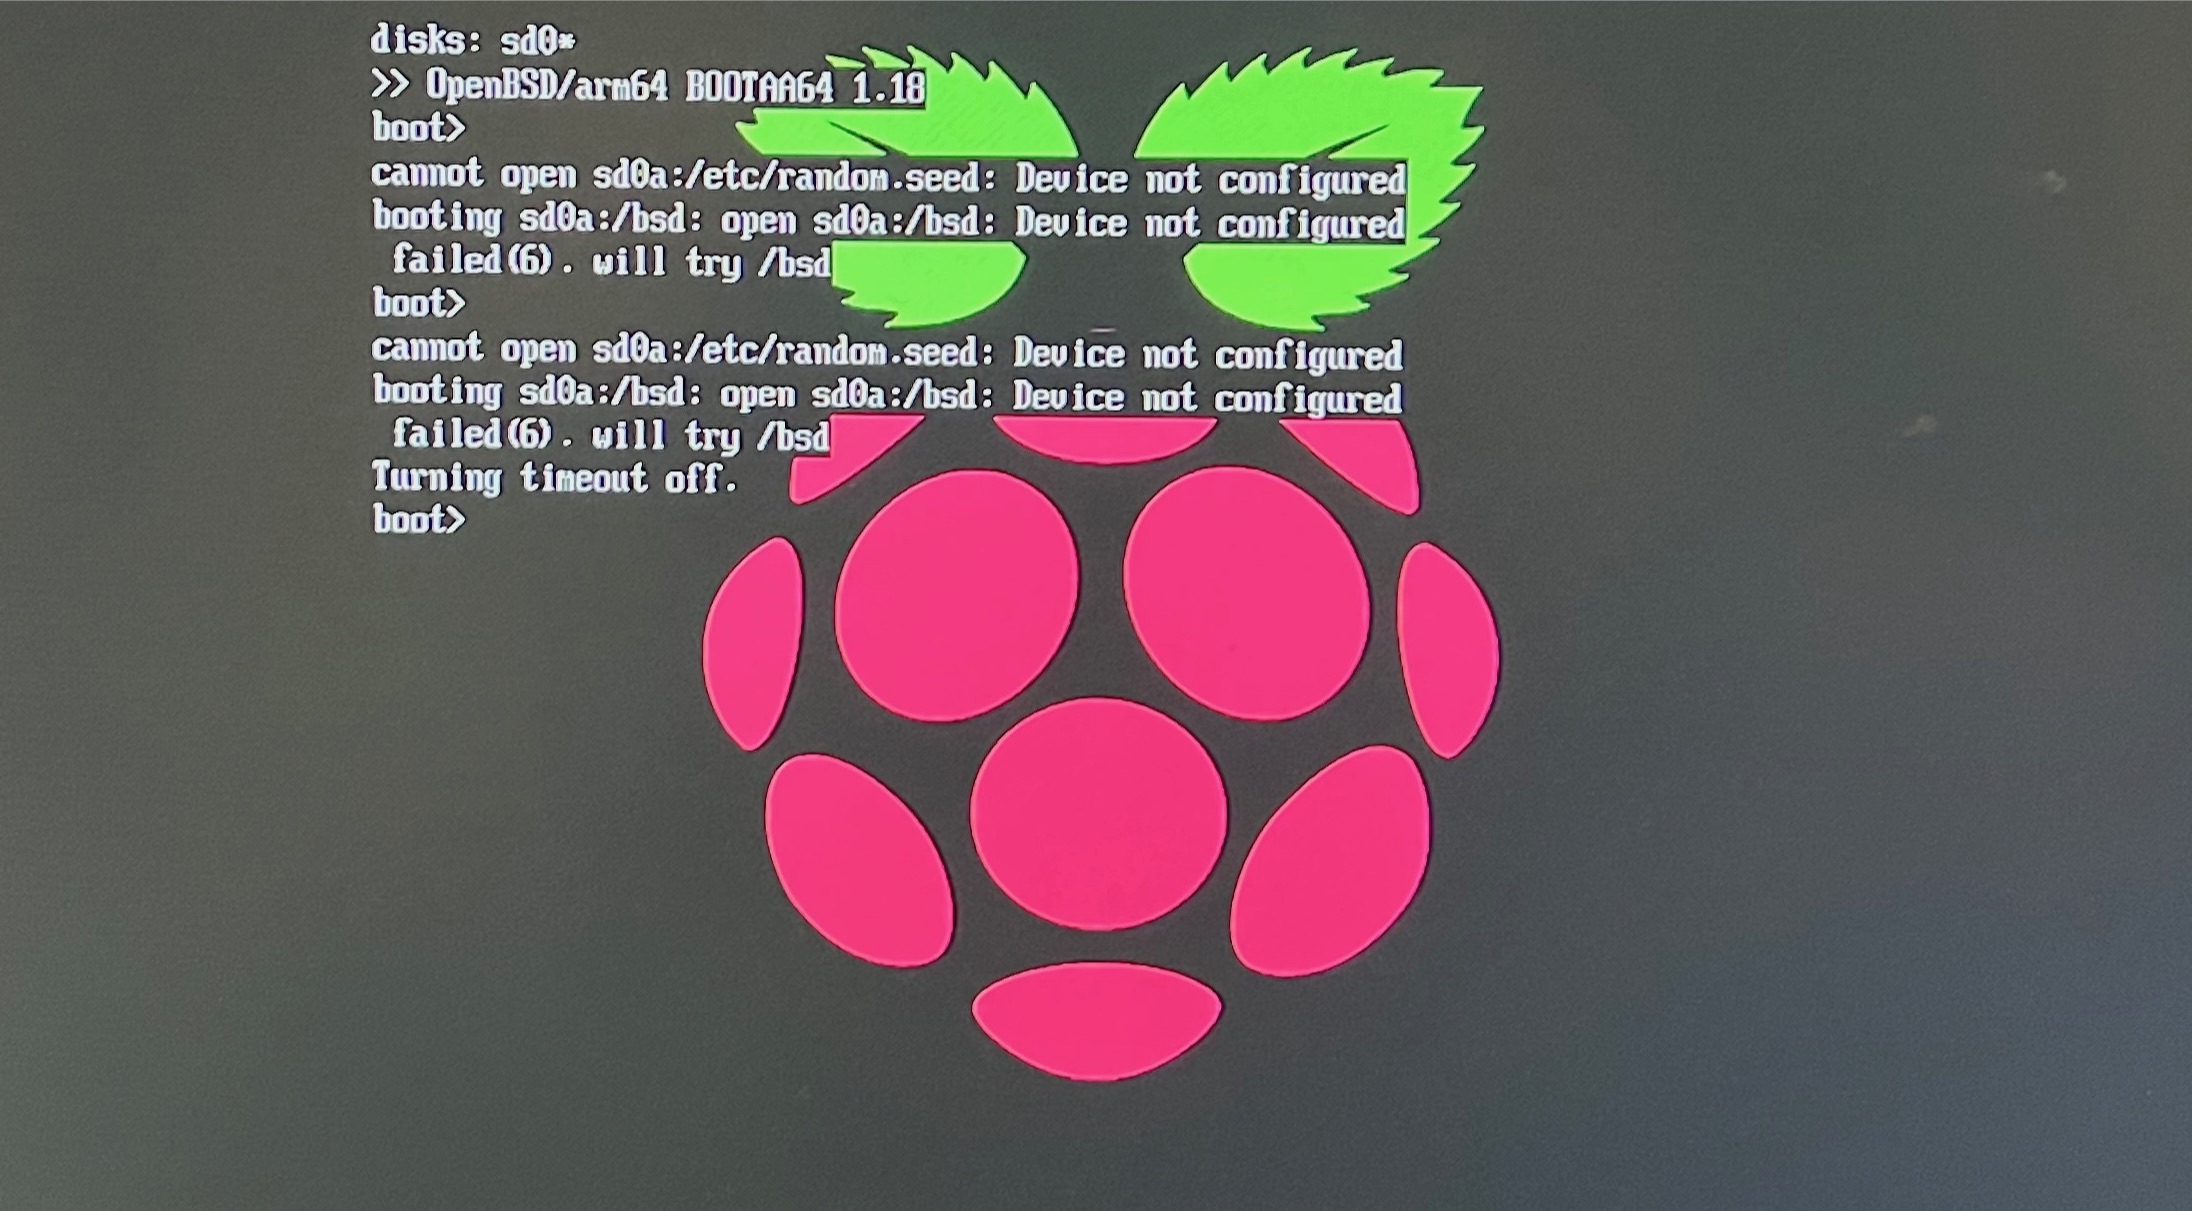
After actually reading the installation instructions, I tried install75.img without adding any
Raspberry Pi UEFI firmware. What a surprise! Turns out that it booted fine 🙄.
However, now there was another issue: typical OpenBSD doesn’t forward the TTY to the frame-buffer,
instead expecting you to attach a serial interface. I didn’t have the energy for that noise, and
luckily you can interrupt the auto-boot and use set tty fb0 to redirect the TTY to the
frame-buffer before continuing with the boot.
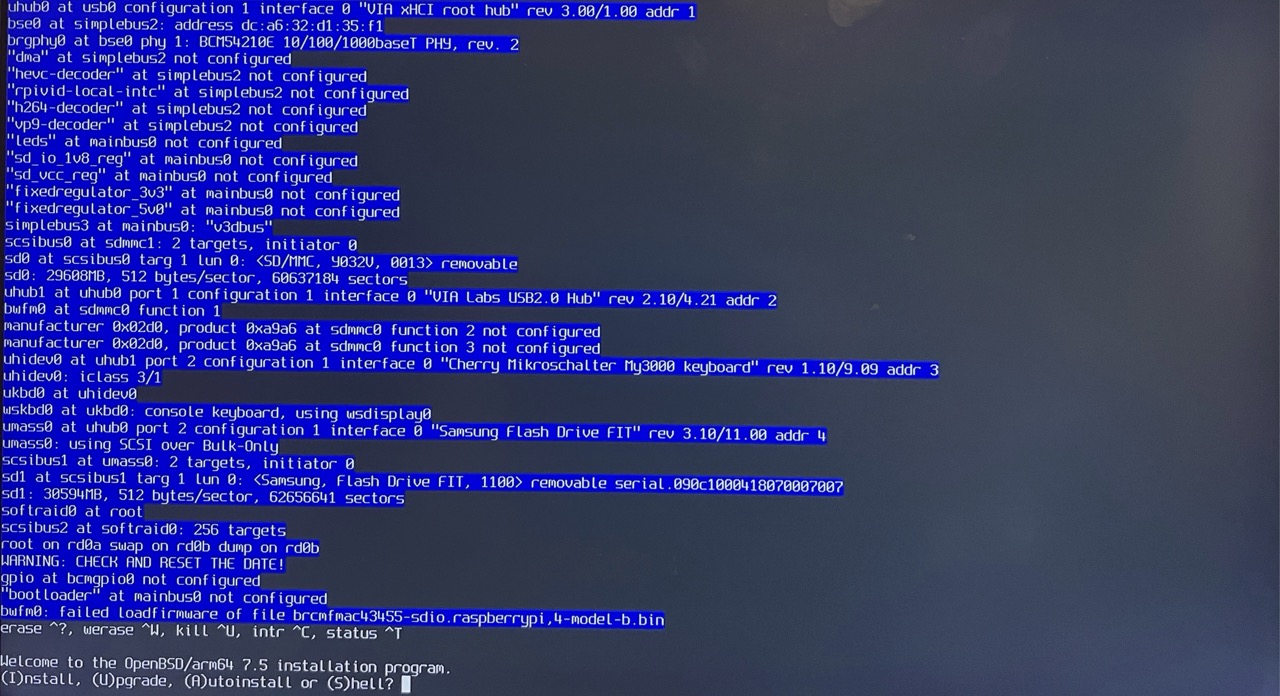
Installing OpenBSD
I shan’t belabour with a blow-by-blow account of the installation of OpenBSD. The installation program for OpenBSD is very good, and a joy to use.
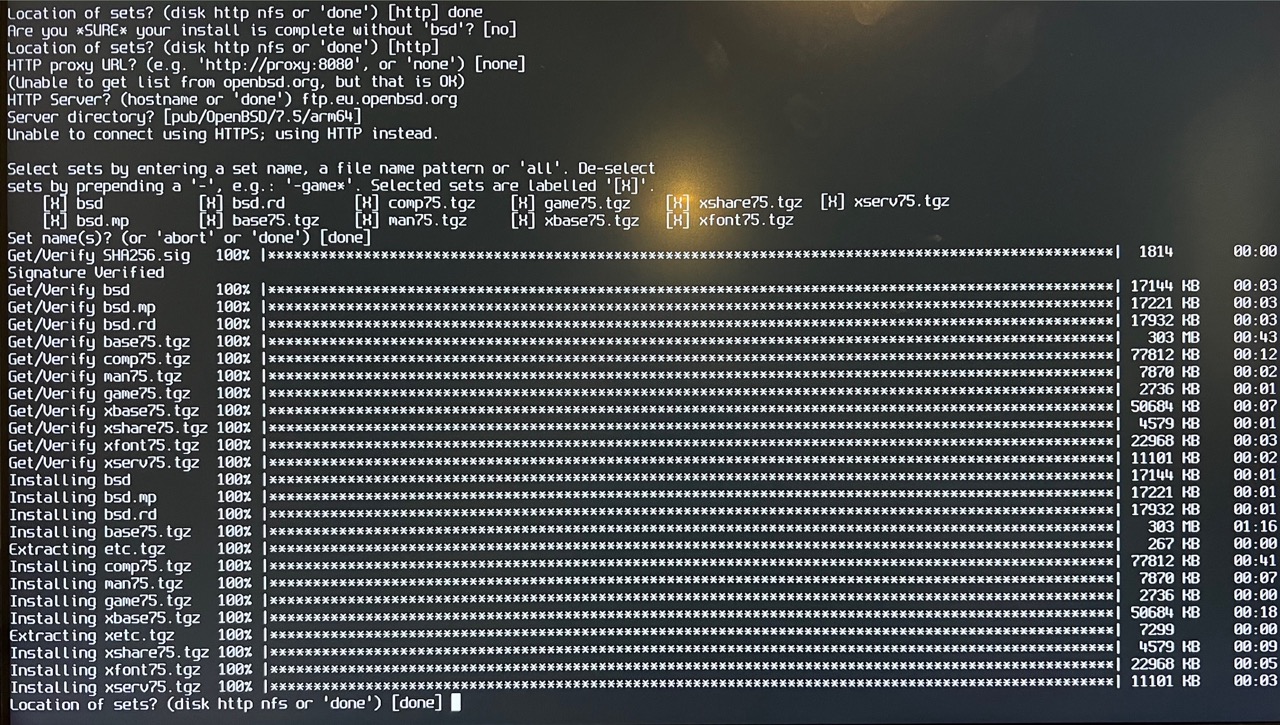
I did have a small issue with getting the sets installed as the installer was unable to connect to
openbsd.org. Instead I had to point it to ftp.eu.openbsd.org to continue. After a short while,
the installer had downloaded all the sets and was ready to reboot.
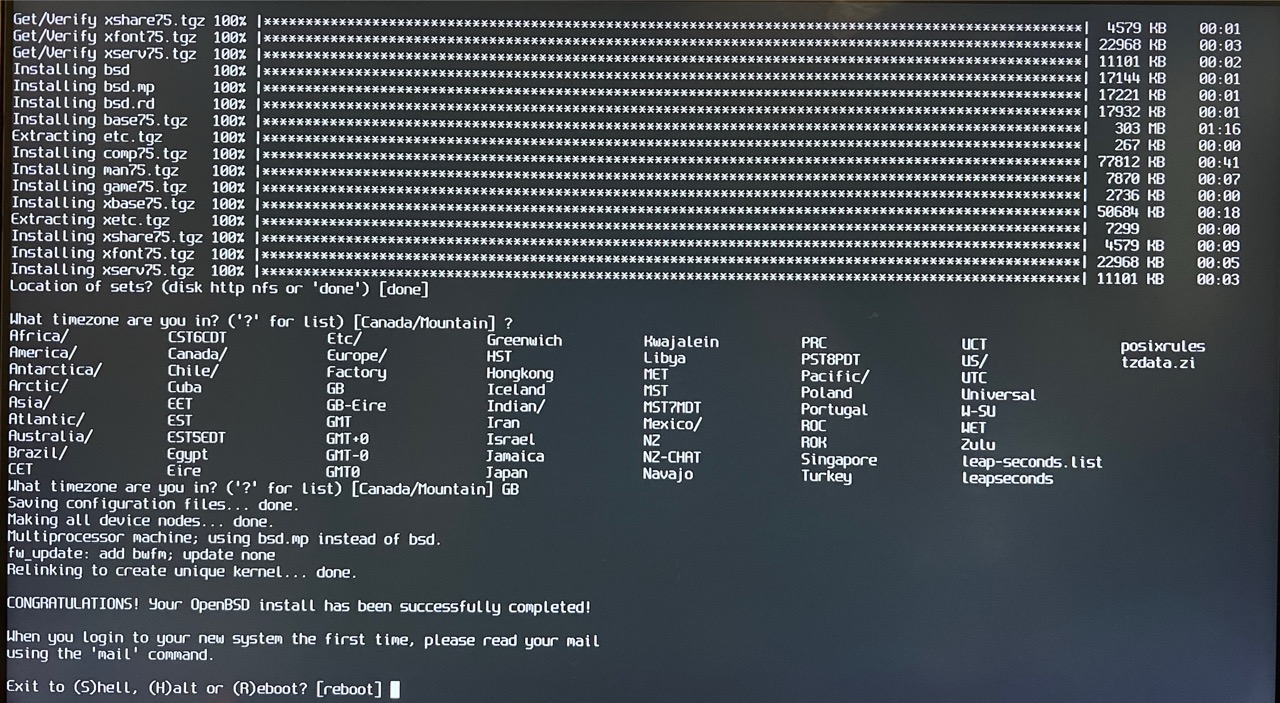
With the installation complete and the system rebooted, I can log in using the root password that I set during the installation. Now I can start configuring the OpenBSD system to be my router and a firewall.
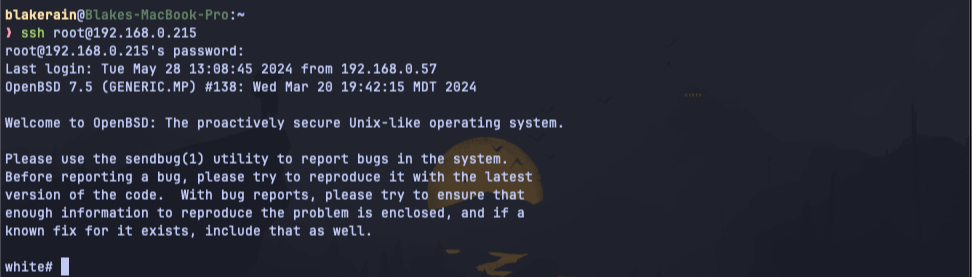
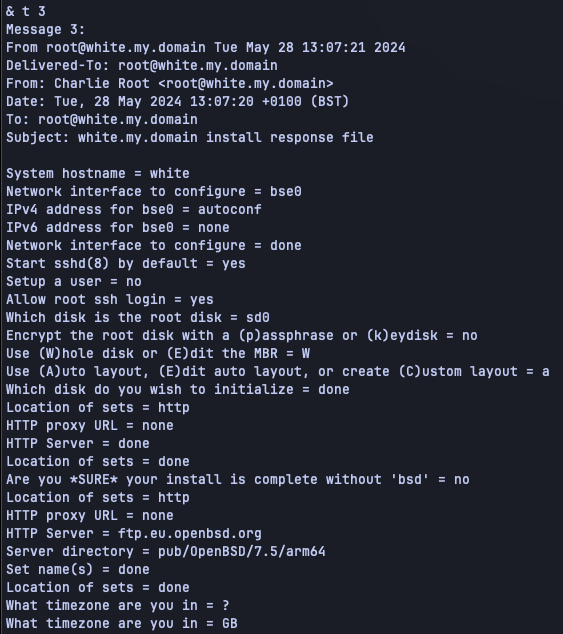
On a side note, I really rather like the way that OpenBSD mails you a list of responses provided during installation.
Once OpenBSD has been installed it is fairly important to make sure that you add a new user for
yourself. You should add this user to the wheel group so that you can su to root. You should
also make sure to set PermitRootLogin to no in the SSH daemon configuration. Ideally you would
also generate an SSH key for your new user, add it to the authorized keys and then disable
password-based access via SSH by setting PasswordAuthentication to no and PubkeyAuthentication
to yes in your SSH daemon configuration.
USB Ethernet Adapter
One small drawback to using a Raspberry Pi was that it only had a single Ethernet port. In order to operate as a gateway, I needed to add another Ethernet port. I decided on using a USB Ethernet adapter, and that I would use that adapter for the connection to the ASDL modem, as my Internet connection is only about 65 Mbps.
The only USB Ethernet adapter I had laying around was an old Microsoft adapter that I used to use with a Microsoft Surface. After messing about a little, I found that I could attach it:
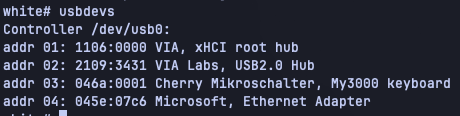
This Microsoft adapter identifies to OpenBSD as an RTL8251 PHY and RTL8153:

Setting Up a Router in OpenBSD
Using ifconfig I was able to take a look at the current state of the network interfaces available:
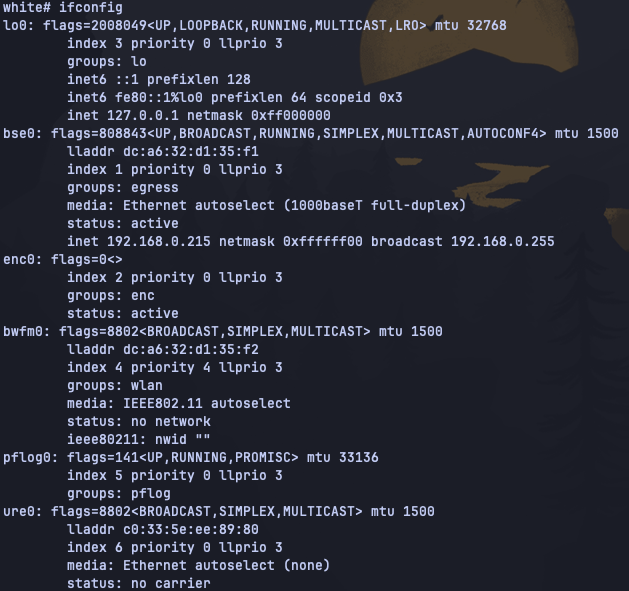
There are two interfaces in this list that were of interest to me:
- The Raspberry Pi’s built-in Ethernet NIC is listed as the
bse0interface, is attached to my LAN switch, and has the IPv4 address192.168.0.215(this is how I am connecting over SSH). - The Microsoft USB adapter is
ure0and is not attached to anything presently, hence theno carrierstatus (ominous rumble of foreboding).
I’m intended to use the built-in bse0 port as the LAN connection, so it will remain connected to
my LAN switch. The ure0 USB Ethernet adapter will be connected to my ADSL modem in place of the
WatchGuard.
Before I got to the router configuration, I first needed to make sure that I was able to configure OpenBSD to connect to my Internet.
PPPoE for Internet
My ISP requires PPPoE for my Internet connection. I’ve never really configured PPPoE before, so I had to consult the manpages on PPPoE and ifconfig. Even then I ended up making some fairly basic mistakes.
To start with, I needed to setup the PPPoE interface. I did this by creating an
/etc/hostname.pppoe0 file with the following contents:
inet 0.0.0.0 255.255.255.255 NONE \
pppoedev ure0 authproto chap \
authname '<username>' authkey '<password>' up
dest 0.0.0.1
I was able to get the username and password from the connection details provided by my ISP. They
also confirmed that the authentication protocol was CHAP. According to the PPPoE manpage, using
the addresses 0.0.0.0 as the local address and 0.0.0.1 as the destination address is sufficient,
and both addresses it will be replaced with those suggested by my ISP.
I then created the /etc/hostname.ure0 to configure the Microsoft USB Ethernet interface:
up
With those settings in place, I used netstart script to apply these configuration changes. I then moved the ADSL modem from the WatchGuard to the USB adapter.
This is where I ran into a problem with the Microsoft USB adapter. The status was always being
reported as no carrier. I tried a different cable, and also tried connecting it to my LAN switch.
In the end, I had to admit defeat: either the adapter was broken or there was a driver issue.
This somewhat stumped my progress until Amazon could deliver me a TP-Link UE306 the following day.
Once I had received the new interface and got it connected I changed the configuration in the
/etc/hostname.pppoe0 to the name of the new device, replacing ure0 with axen0:
inet 0.0.0.0 255.255.255.255 NONE \
pppoedev axen0 authproto chap \
authname '<username>' authkey '<password>' up
dest 0.0.0.1
I renamed the old /etc/hostname.ure0 to /etc/hostname.axen0. Then I ran netstart to apply the
changes.
After reconnecting the modem to this new USB Ethernet adapter, I checked ifconfig to see how the
PPPoE was progressing, only to see that the status of the pppoe0 interface was inactive. To try
and identify the cause I set debugging on the pppoe0 interface, took it down, and then brought it
back up:
# ifconfig pppoe0 debug
# ifconfig pppoe0 down
# ifconfig pppoe0 up
This caused some information to be written to the syslog (found in /var/log/messages). I could see
that the CHAP authentication was proceeding as expected and that it had actually succeeded, but that
the rest of the session configuration had failed.
May 29 15:49:41 white /bsd: pppoe0: chap success
May 29 15:49:41 white /bsd: pppoe0: phase network
May 29 15:49:41 white /bsd: pppoe0: ipcp open(starting)
May 29 15:49:41 white /bsd: pppoe0: ipv6cp_open(): no IPv6 interface
May 29 15:49:41 white /bsd: pppoe0: lcp close(opened)
May 29 15:49:41 white /bsd: pppoe0: lcp opened->closing
May 29 15:49:41 white /bsd: pppoe0: lcp output <term-req id=0x67 len=4>
May 29 15:49:41 white /bsd: pppoe0 (8864) state=3, session=0x1a25 output -> 25:26:2b:1a:aa:0e, len=12
May 29 15:49:41 white /bsd: pppoe0: phase terminate
May 29 15:49:41 white /bsd: pppoe0: lcp input(closing): <term-ack id=0x67 len=4 00-...-00>
May 29 15:49:41 white /bsd: pppoe0: lcp closing->closed
May 29 15:49:41 white /bsd: pppoe0: phase dead
May 29 15:49:41 white /bsd: pppoe0: timeout
May 29 15:49:41 white /bsd: pppoe0: disconnecting
May 29 15:49:41 white /bsd: pppoe0: lcp down(closed)
May 29 15:49:41 white /bsd: pppoe0: lcp closed->initial
May 29 15:49:41 white /bsd: pppoe0: Down event (carrier loss), taking interface down.
This drove me on a number of wild chases. The message no IPv6 interface certainly lead me down a
rabbit hole, as I checked to make sure my ISP did not support IPv6 addresses and that I was not
actually attempting to configure anything IPv6 related. Turns out, a simple reboot made the problem
go away 🙄
After a reboot, the debug messages showed the CHAP authentication completing and the network phase
completed. My red herring no IPv6 interface message was still there, indicating it was probably
fairly benevolent.
Moreover, I could see in the output of ifconfig that the pppoe0 interface was up and running,
and that the inet address was reporting the IP address I expected.
axen0: flags=8843<UP,BROADCAST,RUNNING,SIMPLEX,MULTICAST> mtu 1500
        lladdr 7c:c2:c6:3b:38:a2
        index 5 priority 0 llprio 3
        media: Ethernet autoselect (1000baseT full-duplex)
        status: active
pppoe0: flags=8851<UP,POINTOPOINT,RUNNING,SIMPLEX,MULTICAST> mtu 1492
        index 6 priority 0 llprio 3
        dev: axen0 state: session
        sid: 0x1a29 PADI retries: 2 PADR retries: 0 time: 03:25:17
        sppp: phase network authproto chap authname "<username>"
        dns: <dns-ip-1> <dns-ip-2>
        groups: pppoe egress
        status: active
        inet <my-ip> --> <isp-ip> netmask 0xffffffff
pflog0: flags=141<UP,RUNNING,PROMISC> mtu 33136
        index 7 priority 0 llprio 3
        groups: pflog
This is where I ran into my next problem: no default route. For some reason, I assumed that PPPoE
would automatically add a default route via the pppoe0 interface. Turns out that this is not the
case, and that I needed to add it manually with: route add default -ift pppoe0 <isp-ip>. Rather
than have to do this every time, the example in the manpage for pppoe suggests adding a line to
the end of the /etc/hostname.pppoe0 file to run the route command, substituting the wildcard
address for the destination suggested by the ISP (which I had assumed would be automatic).
My /etc/hostname.pppoe0 configuration now reads as follows:
inet 0.0.0.0 255.255.255.255 NONE \
pppoedev axen0 authproto chap \
authname '<username>' authkey '<password>' up
dest 0.0.0.1
!/sbin/route add default -ifp pppoe0 0.0.0.1
After adding the default route I was able to connect to the Internet from the Raspberry Pi without issue.
Router Configuration
Now that I had the PPPoE up and running I needed to set up the device as a router. To begin with, I
needed to enable IPv4 forwarding using the sysctl command, and then permanently enable it by
writing the setting into the /etc/sysctl.conf file:
# sysctl net.inet.ip.forwarding=1
# echo 'net.inet.ip.fowrarding=1' >> /etc/sysctl.conf
net.inet6.ip6.forwarding to 1 if you want IPv6 forwarding to be enabled as well.Next I needed to configure the Raspberry Pi’s built-in Ethernet port, listed as bse0. To do this I
created an /etc/hostname.bse0 file with the following contents:
inet 192.168.1.1 255.255.255.0 NONE
Using /etc/netstart to apply the configuration changes, I could see in the report from
ifconfig bse0 that the configuration had applied:
bse0: flags=8843<UP,BROADCAST,RUNNING,SIMPLEX,MULTICAST> mtu 1500
        lladdr dc:a6:32:d1:35:f1
        index 1 priority 0 llprio 3
        media: Ethernet autoselect (1000baseT full-duplex)
        status: active
        inet 192.168.1.1 netmask 0xffffff00 broadcast 192.168.1.255
Next I wanted to set up the DHCP server. I wanted to allocate addresses on the LAN in the range
192.168.1.50 through 192.168.1.254. This would give me some lower addresses for static
allocation (servers and what not). To achieve this I first edited the /etc/dhcpd.conf file as
follows:
subnet 192.168.1.0 netmask 255.255.255.0 {
  option domain-name-servers 192.168.1.1;
  option routers 192.168.1.1;
  range 192.168.1.50 192.168.1.254;
}
Then I enabled and started dhcpd using rcctl:
# rcctl enable dhcpd
# rcctl start dhcpd
I was now able to check that the devices on my LAN were able to obtain IP addresses. Some of the
devices needed to be nudged to acquire a new DHCP lease, and one or two needed to be restarted. I
think part of the reason for this was that the subnet had changed from 192.168.0.0/24 to
192.168.1.0/24.
Binding IP Addresses to Devices
I have a number of devices that do not use DHCP to obtain an IP address, and these live in the lower
range of the subnet: 192.168.1.2 through 192.168.1.49. Currently I am configuring each device to
use a specific IP address, however there is an alternative approacj.
In the /etc/dhcpd.conf configuration file for the DHCP server, we can bind IP addresses to
specific devices via MAC addresses. For example, I could attach the address 192.168.1.10 to the
device with the MAC address d8:3a:dd:a5:a4:85 as follows:
subnet 192.168.1.0 netmask 255.255.255.0 {
  option domain-name-servers 192.168.1.1;
  option routers 192.168.1.1;
  range 192.168.1.50 192.168.1.254;

  host orange.arpa.home. {
    fixed-address 192.168.1.10;
    hardware ethernet d8:3a:dd:a5:a4:85;
    option host-name "orange"
  }
}
I chose not to do this, mostly because because I find configuring the devices themselves more useful. No doubt I’ll learn my lesson soon enough.
PF Configuration
My configuration of the packet-filtering firewall was mostly derived from following the description in the OpenBSD Router Guide. Of course the guide contains quite a lot of rules that are related to extra LAN segments, including a DMZ. I have not included those, as I currently only have a single LAN segment.
Dealing with MTU
During early testing I found that there were some problems establishing connections to a small number of servers. I’ve found that this can often be a sign that there might be a problem with the configuration of the MTU/MSS.
To fix this I added the following statement to /etc/pf.conf:
match in all scrub (no-df random-id max-mss 1452)
The intention of this statement is to scrub incoming packets on all interfaces in the following
manners:
- Clear the dont-fragment (DF) flag from matching IPv4 packets. Typically PF will drop fragmented
packets that have this bit set unless
no-dfis set. - Replace the original IPv4 identification field with a random number by setting
random-id. - Changing the maximum segment size (MSS) on TCP SYN packets to be no greater than 1452 bytes.
I initially set the MSS to 1460, thinking that there would be 40 bytes of headroom required in a TCP packet: 20 bytes of IPv4 header and 20 bytes of TCP header. This did not always help, and a colleague recommended 1452 instead, which fixed the issues I was seeing 😊. My colleague reminded me that there would need to be an additional 8 bytes more headroom, as my Internet packets were being encapsulated by PPPoE.
In retrospect, when I was running ping to test the MTU size I was being told exactly what number I
should have been using 🙄.
# ping -s 1472 -I eth0 -M do git.blakerain.com
PING git.blakerain.com (85.10.205.2) from 192.168.1.35 eth0: 1472(1500) bytes of data.
From 192.168.1.1 (192.168.1.1) icmp_seq=1 Frag needed and DF set (mtu = 1492)
ping: local error: message too long, mtu=1492
DNS Configuration with Unbound
In order to provide DNS resolution on the LAN, I needed to set up a DNS server. OpenBSD comes with the caching (non-authoritative) DNS server Unbound. Running a local DNS like this has a number of advantages:
- As all DNS is outgoing from the router rather than individual devices, the security of DNS lookups can be more closely controlled.
- Once a request has been cached by Unbound, subsequent DNS resolution is very fast.
In order to ensure that DNS queries from the LAN interface are only directed to the local DNS server, I added the following PF rule to block UDP/TCP traffic on port 53 (the typical DNS port) that is not destined for the LAN interface:
block return in quick on $lan_if proto { udp tcp } to ! $lan_if port { 53 }
My configuration for unbound mostly follows the OpenBSD Router Guide.
Adding Custom Entries
I have a number of devices that run locally that I want to be able to address by name. Typically
this involves editing the /etc/hosts file on various machines. However, now that I have a DNS
server that I can understand how to configure, I added a few custom entries to the Unbound
configuration in /var/unbound/etc/unbound.conf:
server:
  # ...

  local-data: "cyan.localdomain A 192.168.1.20"
  local-data: "blue.localdomain A 192.168.1.24"
I also added local-data statements for a number of ZeroTier peers.
home.arpa. address.To apply the changes to the Unbound configuration, I used rcctl to restart it:
# rcctl restart unbound
With these extra entries added to my DNS configuration I was able to delete large portions of my
/etc/hosts file. I left the ZeroTier entries, as they would be useful when I’m off the LAN.
Conclusion
Apart from some stumbling blocks, and points where I completely failed to read the instructions, the installation of OpenBSD on a Raspberry Pi went well. Configuring OpenBSD to be a router was mostly extremely simple. The total number of lines in these configuration files is very small:
$ find . -type f | while read file; do if [[ ! "$file" =~ '\.sh$' ]]; then wc $file; fi; done
      58     180    1678 ./unbound.conf
       1       4      36 ./hostname.bse0
      63     382    2266 ./pf.conf
       1       1       3 ./hostname.axen0
       1       1      25 ./sysctl.conf
       4      17     139 ./hostname.pppoe0
       5      15     153 ./dhcpd.conf
I find that having a device that I can simply configure over SSH to be far simpler than wrangling a web interface. This is especially true when compared to the Watchguard interface, which is reminiscent of a 90’s CGI web app.
Being able to add PF rules to match certain traffic patterns, and then use tcpdump to visualize
that traffic is mighty handy.
Related Posts

Adding DNS Adblock to my Unbound Configuration
In this post I share how I added DNS adblocking to the Unbound DNS server configuration on my OpenBSD firewall.
3 Jul 2024•9 min read